This post is based on article CREATE NEW NSG (NETWORK SECURITY GROUP - VIRTUAL FIREWALL ACL) ON MICROSOFT AZURE. Although it is same, but in this I will be showing how to do the same task using PowerShell. Below command creates new NSG with no custom Security Rules. 3 parameters are required -Name, -ResourceGroupName and -Location and they are self explanatory. And new NSG information is stored into a $NSG Variable, which I require to add inbound and outbound rules.
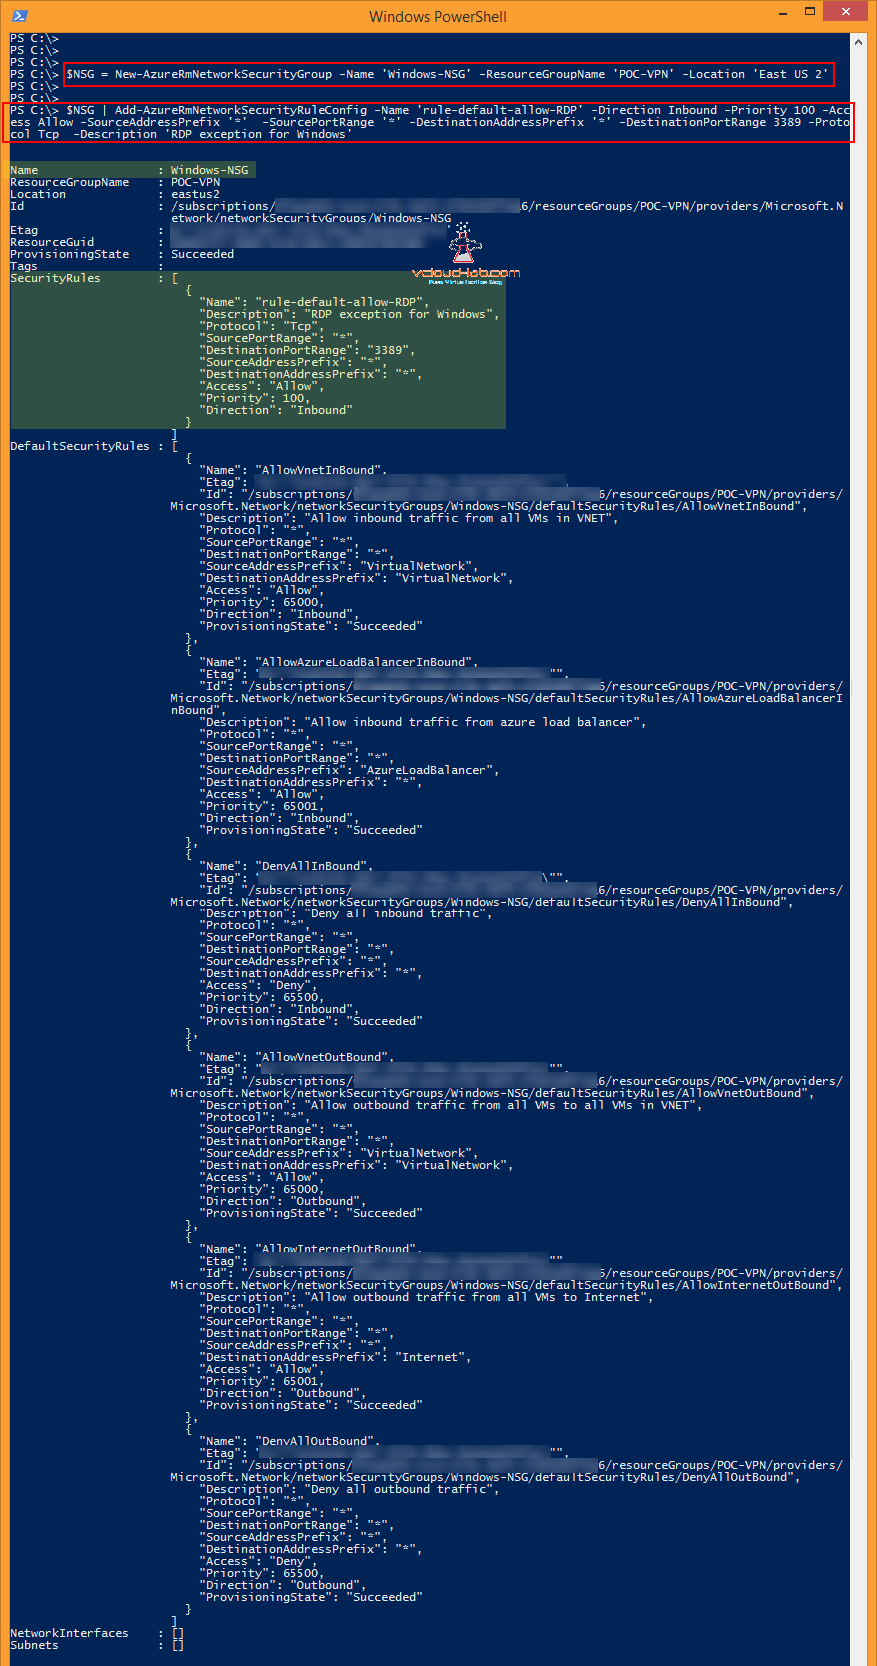
$NSG = New-AzureRmNetworkSecurityGroup -Name 'Windows-NSG' -ResourceGroupName 'POC-VPN' -Location 'East US 2'
As currently no rules (There are by default three default security rules) are there in newly created network security group, I will creating one using below command.
$NSG | Add-AzureRmNetworkSecurityRuleConfig -Name 'rule-default-allow-RDP' -Direction Inbound -Priority 100 -Access Allow -SourceAddressPrefix '*' -SourcePortRange '*' -DestinationAddressPrefix '*' -DestinationPortRange 3389 -Protocol Tcp -Description 'RDP exception for Windows'
Parameters Breakdown
-Name: This is the Name for rule under NSG
-Direction: Direction will be either Inbound or Outbound
-Prioirty: Rule priority (should be between 100 - 4096), Lower The priority number, Higher the precedence.
-Access: This will be either Allow or Deny
-SourceaddressPrefix: Provide the IP or subnet range, * means any IP can connect. Source is the machine from you will be generating connection to destination.
-SourcePortRange: Provide Port range of Source. * means any port.
-DestinationAddressPrefix: Provide the IP or subnet range, Destination is the Azure VM or services.
-DestinationPortRange: Here I am opening only 3389 port on azure virttual machine for RDP.
-Protocol: This can be TCP, UDP or Both
-Description: This option is not visible on Azure Resource manager portal, and can be set through only Powershell, It is good practice to put information about rule.
POWERSHELL - EXPORT AZURE NSG (NETWORK SECURITY GROUP) RULES TO EXCEL
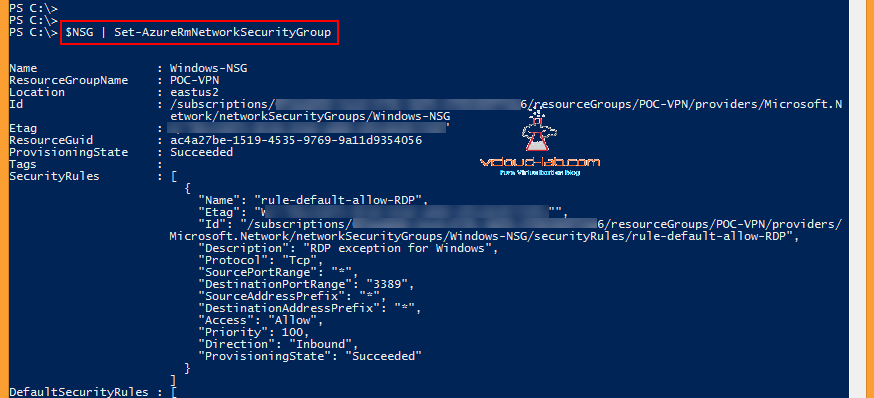
Now Rule is created, but still changes are not committed into Azure, they are still on Local Powershell memory.
To commit changes of new security rules into NSG, execute below command, Once successful It will show the new rules provisioningstate as succeeded, It can be compared with above and below screenshots.
$NSG | Set-AzureRmNetworkSecurityGroup
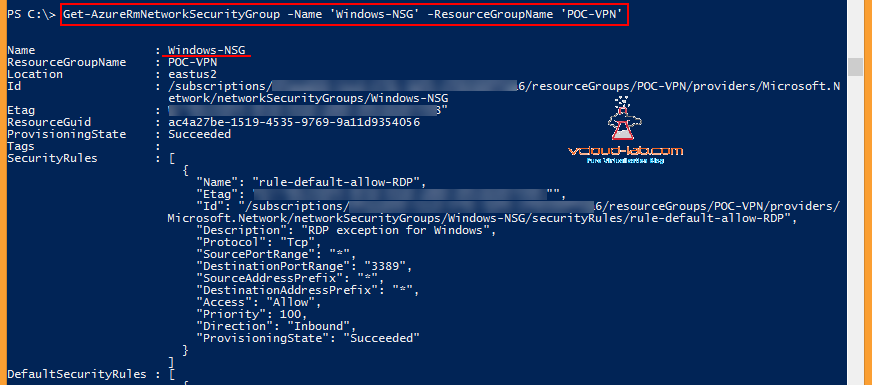
You can use below command on powershell to know about existing NSGs.
Get-AzureRmNetworkSecurityGroup -Name 'Windows-NSG' -ResourceGroupName 'POC-VPN'
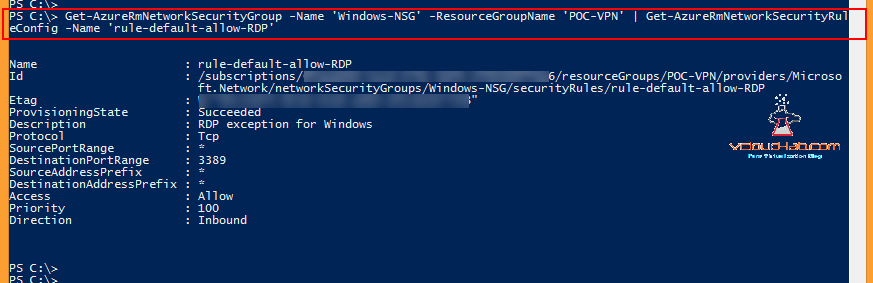
Subsequently Use below One-Liner command to check Network Security rules under NSG.
Get-AzureRmNetworkSecurityGroup -Name 'Windows-NSG' -ResourceGroupName 'POC-VPN' | Get-AzureRmNetworkSecurityRuleConfig -Name 'rule-default-allow-RDP'
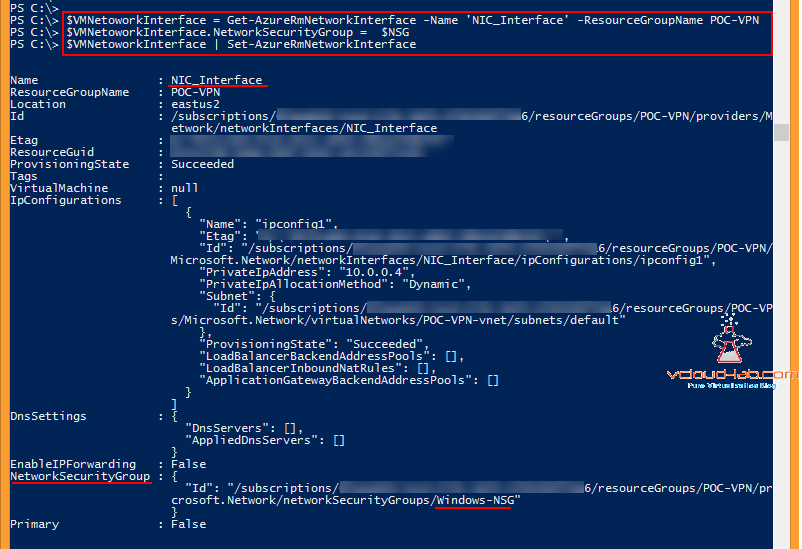
Associating NSG to VM Nic is relatively easy with below commands.
$VMNetoworkInterface = Get-AzureRmNetworkInterface -Name 'NIC_Interface' -ResourceGroupName POC-VPN
$VMNetoworkInterface.NetworkSecurityGroup = $NSG
$VMNetoworkInterface | Set-AzureRmNetworkInterface
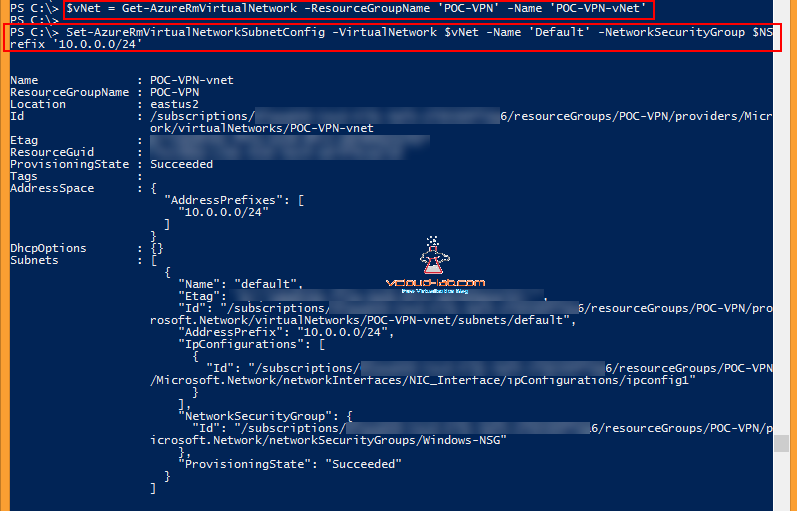
Next is associating Network security group to virtual network subnet. First command I need information about existing vNet stored in $vNet variable
$vNet = Get-AzureRmVirtualNetwork -ResourceGroupName 'POC-VPN' -Name 'POC-VPN-vNet'
And set the existing vNet subnet, make sure you are using correct existing address prefix only.
Set-AzureRmVirtualNetworkSubnetConfig -VirtualNetwork $vNet -Name 'Default' -NetworkSecurityGroup $NSG -AddressPrefix '10.0.0.0/24'
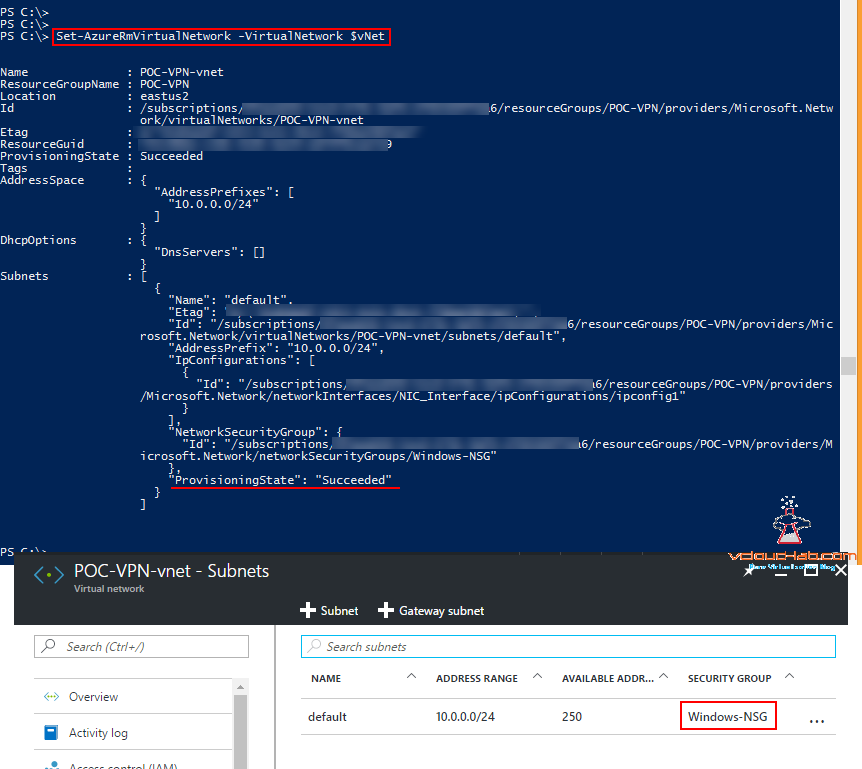
This is the last piece of command, associating NSG in vNet subnet and need to commit the changes in azure.
Set-AzureRmVirtualNetwork -VirtualNetwork $vNet
Useful Links
INSTALLING MICROSOFT AZURE POWERSHELL
PART 9: CREATING AND MANAGING VIRTUAL MACHINE (VM) USING MICROSOFT AZURE RESOURCE MANAGER PORTAL
POWERSHELL - EXPORT AZURE NSG (NETWORK SECURITY GROUP) RULES TO EXCEL
MICROSOFT AZURE POWERSHELL: CLONING (COPING) OR IMPORTING EXISTING NSG (NETWORK SECURITY GROUP) FROM EXCEL
